• Skip to primary navigation
  • Skip to main content
  • Skip to primary sidebar
  • Skip to footer

Her Modern Kitchen

Eating & Living in Austin, Texas

  • About
  • Recipes
  • Austin
  • Lifestyle
  • Baking Bucket List

Desserts

Old Fashioned Drop Cookies with Mocha Frosting

April 3, 2016 by Alyssa

If you love cookies, mocha, and cake then my Grandma’s Old Fashioned Drop Cookies with Mocha Frosting are the perfect sweet treat for you!

Old Fashioned Drop Cookies - Frostin

These Old Fashioned Drop Cookies with Mocha Frosting are cookies I’ve been eating since I was a small child. They’re my Grandma’s recipe, and although I can’t recall her ever making them for me, I do remember my Mom making them all the time.

Mocha Drop Cookies 2

My Mom has a thing for mocha flavored foods and this was one of her favorites! Surprisingly, the only mocha flavoring in the cookie is in the frosting and it’s nothing more than a single teaspoon of instant coffee. Even with such a tiny shot of coffee, the flavor is spot-on — melting perfectly into the slightly sweet, soft chocolate cookie.

Mocha Frosting

…

Read More »

Filed Under: Cookies, Desserts Tagged With: chocolate, cookies, drop cookie, mocha

Biscoff Cookie Butter Pie

March 24, 2016 by Alyssa

Cookie Butter Pie

Biscoff, Speculoos, or Cookie Butter — whatever you want to call it, it’s all the same and it’s all delicious.

If you haven’t a clue what I’m talking about then you should immediately book yourself a Delta flight to anywhere and when snack time rolls around, ask the flight attendant for two of the biscuit packages they’re handing out.  Then send me an email thanking me and tell me how much you love now Biscoff cookies!

…

Read More »

Filed Under: Desserts Tagged With: biscoff, cookie butter, pie, speculoos

Oreo Mint Chocolate Cupcakes

March 17, 2016 by Alyssa

Oreo Mint Chocolate Cupcakes

These cupcakes are ridiculously delicious. I mean, they combine America’s favorite cookie, the Oreo, and mint — probably the best flavor combination to ever exist in the world of desserts! They’re super chocolatey, moist and fudgy. Their chocolate level is definitely in line with that of a brownie, the only difference being these are light and fluffy, rather than dense and crumbly.

…

Read More »

Filed Under: Cake & Cupcakes, Desserts Tagged With: chocolate, cupcakes, Mint, Mint Chocolate, Oreo

Lemon Pound Cake

March 10, 2016 by Alyssa

Lemon Pound Cake

Most people believe the origin of the name Pound Cake is based on the premise that eating it will likely cause them to gain a pound. Although stuffing your face with Pound Cake, or over indulging in anything for that matter, can definitely make you gain a few LBs around the middle, this cake’s origin is all ingredient based.

IMG_3258

IMG_3256

The first recipes date back to the 18th century in Europe. Its name was based on the premise that the cake required 1 pound of each ingredient (flour, butter, eggs and sugar) to make and weighed in at a hefty 4 pounds once baked. This original pound cake produced a very large cake due the quantity of ingredients involved. Nowadays, the ratio of flour, butter, eggs and sugar have been scaled back a bit resulting in a much more consumable portion of cake.

Lemon Pound Cake 2

I love lemon which was my inspiration for this Lemon Pound Cake recipe.  In Austin, it’s beginning to feel a lot like Spring and in my mind, lemons and Spring go hand and hand. This pound cake screams Spring with lemon throughout each layer, using a whopping half-cup of grated lemon zest and 1 cup of fresh squeezed lemon juice distributed throughout the cake, soaking syrup and glaze.

Sliced Lemon Cake

One of my first memories of pound cake is of my Mom making a lemon poppyseed pound cake. I remember her placing it on a wire cooling rack and watching her brush it with a sugar syrup after it came out of the oven. I also remember thinking “Oh man, that’s gonna be one soggy cake!” But oh was I wrong. The sugar syrup was definitely key in creating a super moist pound cake. The syrup helped balance out the tart lemon flavor, creating a sweet, subtle lemon flavored cake. The syrup also gave the pound cake a wonderful shiny exterior that she then drizzled with a simple confectioner sugar & milk glaze.

That cake was my benchmark for this Lemon Pound Cake. It had to contain the three components of my Mom’s — a dense loaf cake, a sweet lemon syrup, and a traditional glaze. This cake definitely hit the mark on the balance of lemon and sweet. It’s great as a late afternoon treat with a cup of coffee or as a light but flavorful dessert in the evening.

Lemon Pound Cake

Lemon Pound Cake
 
Save Print
Prep time
45 mins
Cook time
50 mins
Total time
1 hour 35 mins
 
Serves: 16 slices
Ingredients
  • 1 cup butter, at room temperature
  • 2 cups granulated sugar
  • 4 extra-large eggs, at room temperature*
  • 1 teaspoon vanilla extract
  • ½ cup fresh zest**
  • 3 cups all-purpose flour
  • ½ t baking powder
  • ½ teaspoon baking soda
  • 1 teaspoon salt
  • ¼ cup fresh lemon juice
  • ¾ cup buttermilk***
  • For syrup:
  • ½ cup lemon juice
  • ½ cup granulated sugar
  • For glaze:
  • 2 tablespoons fresh lemon zest
  • 2 tablespoons fresh lemon juice
  • 2-3 tablespoons milk
  • 3 cups confectioner's sugar
Instructions
  1. Preheat oven to 350*
  2. Butter and flour two loaf pans and set aside
  3. In a stand mixer, cream together the butter and 2 cups of sugar until light and fluffy
  4. Add in one egg at a time, mixing each egg on medium until fully incorporated
  5. Scrape down the sides of the mixer then add in the vanilla extract and lemon zest
  6. In a separate bowl, sift together the flour, baking powder, soda, and salt
  7. In 4 additions, alternate adding the flour mixture and buttermilk
  8. Once incorporated, scrape down the sides of the mixer then add in the ¼ cup of fresh lemon juice
  9. Evenly divide the batter between the two loaf pans
  10. Bake in the oven for 45-50 minutes until a toothpick inserted into the cake comes out clean
  11. If while baking, you notice the tops beginning to brown, simply place some aluminium foil over the cakes to keep the tops from burning
  12. While the cakes are baking, begin on the lemon soaking syrup
  13. In a pot over low heat, combine the ½ cup of sugar and lemon juice until the sugar has dissolved
  14. Remove from heat and set aside
  15. When the cakes are done baking, let them cool for 15 minutes within their pans
  16. Once cooled slightly, remove them from their pans and place them on a cooling rack atop a large sheet pan (to catch the soaking syrup)
  17. Lightly brush the tops and sides of the cake with the lemon syrup (you will have syrup leftover, and that's okay)
  18. Let the cakes cool completely while making the glaze
  19. In a large bowl, whisk together the glaze ingredients, adding milk until you reach your desired consistency
  20. When the cakes are cooled, pour the glaze over top while the cakes are still on the cooling racks
  21. Let the glaze set a bit before slicing and serving
Notes
* If your eggs are not at room-temperature, fill a large bowl with tap-warm water and place the eggs in the bowl while you prep the pans and other ingredients. In about 5-10 minutes the eggs should be at room temperature.
**To quicken the prep period, first grate ¾ cup of lemon zest (about 6-8 lemons) ahead of time and then squeeze the zested lemons, resulting in about 1 cup of fresh juice. Use this source to make the cake, syrup, and glaze.
***To make 1 cup of buttermilk (if unavailable) add 1 teaspoon of distilled white vinegar to a measuring cup then fill the measuring cup to the 1 cup mark with milk and let sit 5-10 minutes
3.5.3208


Filed Under: Cake & Cupcakes, Desserts Tagged With: lemon, pound cake

Cake Batter Cheesecake

March 2, 2016 by Alyssa

Cake Batter Cheesecake

When I was younger, my Mom used to make ice cream cake with an Oreo cookie crust. I absolutely loved the crust of this ice cream cake so much that I requested my Mom to make ice cream cake crust cookies. She informed me that this cookie crust I loved was nothing more than crushed Oreos, sugar, and butter. And she would NOT be making be Ice Cream Cake Crust Cookies. But that sure did explain why I loved the crust so much, how could you not love Oreos, sugar and butter all mixed together?

Cake Batter Cheesecake 2

My love for this crust inspired this Cake Batter Cheesecake recipe. I was doubtful when I first came upon Cake Batter flavored Oreos but boy was I wrong. They were spot on delicious. Exactly as you’d dream a Cake Batter Oreo to taste. (Hats off to you, Nabisco, you nailed it!)

CrumbsCrumbs

Knowing I wouldn’t be able to control my cravings for these Cake Batter Oreos, I decided I had to make something with them. In other words, it’d let me share the wealth and remove the Oreo temptation from our pantry. I set out on creating a Cake Batter Cheesecake for a few reasons

  1. Cake Batter anything is pretty darn spectacular
  2. <3M love cheesecake
  3. I love sprinkles
  4. Cookie crust made of Oreos, sugar and butter = heaven

IMG_2947

IMG_2950

Using my pal, Martha Stewart’s cheesecake recipe as a base, I set out to make the ultimate Cake Batter Cheesecake.

When making something Cake Batter flavored, there’s only one route to take and that is to add actual cake mix – like the kind you get from a box at the grocery store.

You can dabble with adding a mix of Almond + Vanilla extract and some sprinkles but I promise you, that authentic buttery, vanilla marshmallow-like cake batter flavor will not be achieved. In reality, you just end up making Vanilla-Almond Cheesecake…with sprinkles.

IMG_2951

IMG_2953

I also modified the base recipe some when it comes to baking technique as I am not a fan of the water bath cooking method. For me, it’s just too much of a risk. You have to ensure your springform pan is perfectly sealed and even if you wrap the bottom with foil, there’s never a 100% guarantee water won’t seep into your cheesecake. I’m not sure about you, but nothing makes me more mad than seeing my hardwork turn into a soggy waterlogged, pudding cheesecake.

IMG_3017

When baking this cheesecake, I still include water in the process to ensure a moist cheesecake but the actual springform pan is baked atop another pan that’s submerged in water, guaranteeing that the precious cheesecake won’t drown during the baking process.

IMG_3022

The result is a moist, creamy flavorful cheesecake. It has the slight tang of a traditional sour cream cheesecake with a subtle sweetness and a distinct cake batter flavor. The added sprinkles make the cake fun to eat and look at while the Cake Batter Oreos bring in an extra hit of cake batter flavor with a complimenting crunch to match the creamy, smoothness of the cheesecake.

This is definitely a cake I’ll be making again in the future, if I don’t eat all the Cake Batter Oreos first.

CakeBatter Pinterest

Cake Batter Cheesecake
 
Save Print
Prep time
60 mins
Cook time
1 hour 30 mins
Total time
2 hours 30 mins
 
Serves: 12
Ingredients
  • 1 package Cake Batter Oreos
  • 6 tablespoons unsalted butter, melt
  • 1 tablespoon sugar
  • 4-8 ounce bricks of cream cheese, at room temperature
  • 4 eggs, at room temperature
  • 1 cup sour cream
  • 1 cup sugar
  • 1 tablespoon vanilla extract
  • 1 cup yellow cake mix
  • ½ cup sprinkles
  • whipped cream, optional
Instructions
  1. Preheat the oven to 375*
  2. With a bit of the melted butter, lightly brush the bottom and sides of the springform pan
  3. Line the bottom of a spring form pan with parchment paper and set aside
  4. To make the crust, place the Oreos in a food processor and pulse the cookies until a fine crumb forms.
  5. Add the remaining melted butter and 1 tablespoon of sugar and pulse again until combined.
  6. Press cookie crumb mixture into the bottom of the springform pan.
  7. Place the springform pan in the oven and bake for 15 minutes
  8. Once baked, place the crust in the fridge for 5 minutes to cool.
  9. To make the cheesecake filling, beat the softened cream cheese in an electric mixer on medium for 2 minutes until light and fluffy.
  10. Add in the sugar and beat again for 1 minute until fully combined.
  11. Add in the eggs, one at a time, scraping down the sides of the bowl before each new egg addition
  12. Add in the sour cream and vanilla extract
  13. Once combined, add in the cup of yellow cake mix until fully incorporated
  14. Remove the mixture from the electric mix and fold in the half cup of sprinkles by hand.
  15. Pour the cheesecake mixture into the cooled springform pan
  16. To prepare for baking, place a round, 9 inch cake pan upside down in a roasting pan
  17. Pour boiling water into the roasting pan until the cake pan is ½ to ¾ covered with water
  18. Place the cheesecake springform pan on top of the upside down cake pan and place the entire setup into the oven.
  19. Bake the cheesecake at 375 for 45 minutes.
  20. After 45 minutes, lower the temperature to 325 and cook for an additional 30 minutes.
  21. Once baked, removed the cheesecake from the oven and place it in the refrigerator to cool for 6 hours or overnight.
  22. When ready to serve, remove the cheesecake from the fridge and let it stand at room temperature for 5 minutes.
  23. Release the cake from the springform pan.
  24. To cut, use a sharp knife dipped in hot water and wiped dry to make cuts into the cake.
  25. Be sure to submerge and dry the knife in hot water in between each cut.
  26. Serve with a dollop of whipped cream on top and extra sprinkles, if desired.
3.5.3208


Filed Under: Cake & Cupcakes, Desserts Tagged With: cake batter, cheesecake, oreos

Ginger Spiced Cookies

February 26, 2016 by Alyssa

These cookies are a delicious cross between a snickerdoodle and a gingerbread!

IMG_2814

They contain the warm, flavorful spices of ginger, cinnamon, clove and molasses found in gingerbread yet they’re soft, chewy and rolled in sugar in the same way as a classic snickerdoodle.

imageedit_16_8957419488

They are delicious no matter how they are eaten — warm, straight out of the oven,  dunked into a steamy cup of coffee, or frozen straight out of the freezer with a scoop of vanilla ice cream and drizzle of caramel sauce.

IMG_2824

I absolutely love these cookies and they’ve been in my family’s repertoire for at least 10 years. This recipe was shared with me by a fellow lifeguard-friend whom I was working with the summer after my Senior year of high school.

There was a group of us, all fresh out of high school or in our first years of college, who spent every summer together for 3 or 4 years, working as lifeguards at Hamlin Beach in upstate New York. We’d eat most meals together, workout together, train together, and always, party together.

IMG_2813

It was only natural that we became the best of friends each summer after spending so much time together. But each year, once Autumn came about, we all departed on separate paths. Even now a days, we ‘keep in touch’ passively via Facebook. Watching one another graduate college, get married and start a family or move across the country. I am very lucky that Kevin (the lifeguard behind the recipe) shared his secret to these Ginger Spiced Cookies with me before we all lost touch.

IMG_2822

It’s strange how we don’t even talk anymore but this cookie always reminds me of those summers and my friends at that time during my life. Isn’t it funny how food does that? How it brings you back to a specific moment in time? Making you pause, smile and watch as the memories play in your mind? I love it.

IMG_2819

This recipe is one that makes close to 6 dozen so at the time, it was more than enough for a hungry group of lifeguards to share. The cookies don’t have any chocolate or caramels in them so they were safe for us to have about in the sun all day without the fear of melting.

Although I love the original cookie recipe just the way it is, I modified it a tad by adding candied ginger.

This single element makes it seem a bit more ‘grown up’ and mature — matching my current state of life. I love the added chew the finely diced candied ginger brings to the cookie along the small bite of gingery heat that’s hidden inside.

Although the recipe states to roll the dough into round balls then into sugar, you can definitely skip this step if you’re in a rush or don’t feel like any extra effort. They’re still just as delicious even without the sugar coating!

IMG_2805

IMG_2813

This Ginger Spiced Cookie is one that I will continue to make for years to come, eventually sharing with my own family, and each time, I’ll reflect on those amazing, fun summers spent with my lifeguard friends on the shores of Lake Ontario.

Do you have any foods that bring back a special memory?
Where have some of your favorite recipes come from?

Ginger Spice Cookies
 
Save Print
Prep time
30 mins
Cook time
45 mins
Total time
1 hour 15 mins
 
These cookies are a wonderful cross between a snickerdoodle and a gingerbread. They contain the warm, flavorful spices of ginger, cinnamon, clove and molasses found in gingerbread yet they're soft, chewy and rolled in sugar in the same way as a classic snickerdoodle.
Author: Alyssa
Serves: 6 dozen
Ingredients
  • 4½ cups all-purpose flour
  • 4 teaspoons ground ginger
  • 1½ teaspoons ground cinnamon
  • 1 teaspoon cloves
  • 2 teaspoons baking soda
  • ¼ teaspoon salt
  • 1½ cups butter flavored shortening
  • 2 cups granulated sugar
  • 2 eggs
  • ½ cup molasses
  • ½ cup finely diced, candied ginger (optional)
  • ½ cup granulated or course sugar, for rolling
Instructions
  1. In a medium sized bowl, whisk together the flour, ginger, cinnamon, cloves, baking soda, and salt.
  2. Set aside
  3. In a large mixing bowl, cream together the shortening and 2 cups of sugar until fluffy.
  4. Add in the eggs and molasses and beat well.
  5. Add in one third of the flour mixture and mix on low to combine.
  6. Continue until all flour is added and thoroughly combined.
  7. Stir in the candied ginger pieces until dispersed throughout.
  8. Shape the dough into 1 inch balls and roll in the remaining ½ cup of sugar until fully coated.
  9. Place the cookie dough on an un-greased cookie sheet about 2 inches apart.
  10. Bake at 350*F for 12-14 minute or until cookies are light brown and slightly puffed.
  11. Do not over bake or the cookies will lose their chewy quality.
  12. Let the cookies stand on tray for 2 minute before transferring to a wire rack to cool completely.
3.5.3251


Filed Under: Cookies, Desserts Tagged With: cookie, ginger cookies, ginger spice

Valentine’s Day Sugar Cookies

February 15, 2016 by Alyssa

I’m a sucker for any holiday as it gives me an excuse to bake holiday-themed goodies. This year, I couldn’t help but be swept up by the mass of hearts, pink, and red that greeted me at Target earlier in the week, so of course, I quickly snatched up a set of heart cookie cutters with the intent of making some holiday themed cookies!

Lace Hearts

…

Read More »

Filed Under: Cookies, Holiday Tagged With: cookies, hearts, valentine's day

Indian Cupcakes: Rose Cake with Orange Cardamom Frosting

December 7, 2014 by Alyssa

I’m not sure all of you know this or not but I am not a fan of Indian desserts. They’re either too sweet – as the case with kaju burfi or the texture is too different for me – such as ras malai.

Since I usually pass on desserts when at an Indian restaurant or at <3M’s family’s home, I wanted to create a dessert that still had Indian flavors but catered more to my taste and texture preference while still make it something <3M would enjoy and associate with home.

In all, this cupcake was truly inspired by <3M. Indian desserts are something I would never make myself but I wanted to treat him to a Indian sweet of my own and thus I was inspired to merge an American favorite (cupcakes!) with Indian flavors.

The idea for rose cupcakes had been floating around in my mind for months. Now, in all honesty, I don’t even care for rose!
I’m not a fan of it in perfume, I don’t like it in a lassi or kulfi but the thought of it as a cupcake appealed to me – maybe because I knew I could control the depth of the rose flavor if I myself were making it.

10518298_10100347362679366_8245722105632243938_o

Now, the rose cupcake idea was easy, it was the frosting that had me stuck for a while. I have always loved Orange Cardamom cupcakes. The flavors are unique – it has a citrusy sweet touch from the orange and a slight spiciness from the cardamom. Since cardamom is a prominent flavor in Indian foods, I wanted to incorporate it into the cupcake in some way.

How they’d pair with rose, I wasn’t quite sure. I was hopefully though that the delicate rose would off se the spice that cardamom brought and decided to wing it.

I initially searched online for a cupcake recipe within the rose & orange cardamom spectrum but was unable to find one. There were lots of rose vanilla cupcake recipes out there but after reviewing the recipes, they didn’t fit with my baking preferences. Most used a rose extract which I thought would be too strong or too fake tasting.

In my mind, I was set on using rose water. Rose water itself is slightly diluted but fragrant. And after tasting these cupcakes, I knew my intuition was correct – using rose water was perfect. The cake itself doesn’t have a strong flavor of rose but the scent is there and because eating is a multi-sensual experience, you believe you truly are eating a rose flavored cupcake – but it’s enjoyable without the flowery potent taste one tends to associate with rose.

As for the frosting, again – that citrusy sweet, spice combination pairs perfectly with the delicate rose. And there’s the added crumble of pistachios on top for a bit of texture to balance the light fluffy cake and the creamy frosting.

If you decide to make them, I’d love to hear your thoughts!

Indian Cupcakes: Rose Cake with Orange Cardamom Frosting
 
Save Print
Prep time
20 mins
Cook time
20 mins
Total time
40 mins
 
Rose Cake with Orange Cardamom Frosting
Serves: 2 dozen
Ingredients
  • 1 and ⅔ cup all-purpose flour
  • ½ teaspoon baking powder
  • ¼ teaspoon baking soda
  • ½ teaspoon salt
  • 1 cup granulated sugar
  • ½ cup unsalted butter, melted
  • 2 egg whites
  • ¼ cup greek yogurt
  • ½ cup milk (any kind - almond, coconut, cow..)
  • ¼ cup rose water
  • 2-3 drops red food coloring (if you wish cupcakes to be pink)
  • ½ cup unsalted butter, softened
  • 2½ - 3 cups powdered sugar
  • 3 tablespoons half and half
  • 1 tablespoon orange juice (fresh or bottled)
  • zest from ½ orange
  • 2 teaspoons cardamom
  • ¼ cup pistachios, finely chopped
Instructions
  1. Preheat oven to 350F degrees. Line muffin tin with 12-15 cupcake liners. Set aside.
  2. In a bowl, mix together flour, baking powder, baking soda, and salt. Set aside.
  3. In a large bowl, whisk together the melted butter and sugar. Once combined, whisk in the egg whites, yogurt, milk, and rose water until combined.
  4. Slowly add the dry ingredients into the butter, egg, milk mixture ingredients until well combined.  If using food coloring, add it at this time.
  5. Divide batter among 12-15 cupcake liners (or 24-30 mini) and bake for 14-17 minutes.  Meanwhile, make the frosting.
  6. To make the frosting, beat softened butter on medium speed with a stand mixer until smooth and creamy (at least a minute)
  7. Add 2½ cups powdered sugar, half and half, orange juice, orange zest, cardamom. Increase to speed and beat for 1-2 additional minutes. At this time add the food coloring (if using) and additional powdered sugar if the frosting is too thick - or more cream if the frosting is too thick.
  8. Chill frosting for 15 minutes prior to using.
  9. Once the cupcakes are completely cooled, frost the cupcakes and sprinkle with pistachios.
Notes
**If you care to color your frosting orange, follow your food coloring's directions for doing so. My coloring was 7 drops yellow to 1 drop red.
3.5.3208

Filed Under: Cake & Cupcakes, Desserts Tagged With: cupcakes, Indian, orange, rose

Chocolate Almond Cheesecake Bites

January 22, 2014 by Alyssa

I lied when I said I didn’t like cheesecake. It’s true.  I tell everyone that I don’t like cheesecake but the truth is…I do like it and for some reason, cheesecake seems to be a favorite dessert of most people I know. Americans in general are crazy about it.  Heck, there’s even  a restaurant named after it!  I specifically remember my college roommate declaring her love for cheesecake, stating that she’d be having cheesecake as her wedding cake — years before she knew who she’d be marrying.

Chocolate Almond Cheesecake
[And for the record, she had cheesecake.  Darn good cheesecake at that.  Some how, she mixed my two least favorite desserts, cheesecake & red velvet cake (I’ll talk about that another day), into a wedding cake and it tasted amazing!]

Unfortunately, with the exception of my college roommate’s wedding cake, I don’t tend to go as gaga as most over cheesecake.  Not because I dislike the flavor or taste of cheesecake but mostly due to the fact that the texture is lacking and it’s a rather  a calorie dense dessert — from crust to filling to the traditional cherry topping.

DSC01127

Let me break it down for you —

Crust:
This is basically cookies [they try to trick you by calling them crackers, but they’re cookies] mixed with butter and baked to make another cookie to use as the crust.  Simply put, you just made cookies with butter and more cookies.

  • Graham Crackers: Simple enough, not really all that indulgent as long as traditional grahams are being used rather than the cinnamon-sugar topped crackers
  • Butter:  Butter isn’t actually horrible for you. But 9 out of 10 doctors don’t recommend drenching cookies in butter.

Cream Cheese Filling:
This is simply fat-added, sugar sweetened, emulsified milk.

  • Cream Cheese: This is usually full-fat cows milk mixed with emulsifiers to lend firmness, stabilizing the cream and lengthening the cheese’s shelf-life.  [Have you ever looked at the expiration date on unopened cream cheese?  It’s at least 3 months.  Doesn’t that freak you out?]
  • Cream: Yep, more cream because the cream from the cheese just isn’t enough.
  • Sugar: This is totally acceptable, this is a dessert.

Topping:

  • Cherry Pie Filling [from a can]: Yes, I’m specifically stating it’s from a can because the likelihood of someone actually making their own cherry topping is slim to none.  America is all about short cuts and there’s nothing easier than “open & dump” when it comes to can goods.This canned pie filling is unnatural and overly sweet.  The red filling sure is pretty against the white creamy cheesecake base but doesn’t it look a tad artificial to you?  Have you ever seen cherries that hue of red? No?Me either. That’s because it’s fake.  And those cherries, they’ve been soaking in that thick, sugary syrup for god knows how long. They’re basically artificially flavored sugar bombs.

Now, usually, cheesecake – and most cakes at that – are served in oversized portions making that fatty, sugary dessert sitting on your plate that much more of an indulgence.  And if that’s what your intention is, to completely indulge, then pick up your fork and savor every bite!

But for those of us that want to enjoy cheesecake without guilt as a regular weekday dessert – I went about healthifying my version of cheesecake, creating Chocolate Almond Cheesecake Bites!

They’re portion controlled bites that have a bit of added cocoa powder, chocolate chips and almonds to make for a flavorful, decadent weeknight dessert without the calorie and sugar bomb splurge of traditional cheesecake.  The almonds also add a dose of healthy fat, give the crust a bit of extra crunch and the mini chocolate chips add some texture and a touch of bittersweetness to the filling!

Chocolate Almond Cheesecake Bites
 
Save Print
Prep time
40 mins
Cook time
90 mins
Total time
2 hours 10 mins
 
Serves: 24 bites
Ingredients
  • 5 sheets reduced fat graham crackers
  • ¼ cup whole, unsalted almonds
  • 3 tablespoons butter, melted
  • 8 oz ⅓ less fat cream cheese, softened*
  • 6 ounces nonfat plain yogurt
  • ¼ cup egg whites **
  • ⅓ cup granulated sugar
  • 3 tablespoons unsweetened cocoa powder
  • 1 tablespoon all-purpose flour
  • 1½ teaspoons lemon juice
  • ½ teaspoon pure vanilla extract
  • ¾ teaspoon pure almond extract
  • ¼ cup mini semi-sweet chocolate chips
Instructions
  1. Pre-heat oven to 350 degrees fahrenheit. Line a mini-muffin pan with 24 foil liners and set aside.
  2. First make the crust -- In a food processor, process graham crackers until they reach a crumb-like consistency. Place in a small bowl and set aside. In the same processor, grind almonds into an almond-meal consistency and mix with graham cracker crumbs.
  3. Combine graham cracker-almond crumbs with the melted butter until just coated, it will still be slightly course in texture. Distribute mixture evenly into cupcake liners and firmly press crumbs together to form a tight crust. Bake 7 minutes or until set. Remove from oven and set aside to cool while making the filling.
  4. Now make the filling -- In a stand mixer, beat cream cheese for 2 minutes. This is mandatory as it helps give the filling a light texture by incorporating air. Beat in the yogurt, egg whites, sugar, cocoa powder, and flour until smooth [about 2-3 minutes]. Add in the lemon juice and the vanilla & almond extracts until just combined. Remove from mixer and fold in chocolate chips.
  5. Evenly distribute the filling into each cupcake liner, filling about ¾ of the way full**. Bake for 16 - 18 minutes. Remove from oven and let cool for at least 30 minutes. Finish cooling by placing the pan in the refrigerator for 2-3 hours. Serve after being well chilled.
Notes
* If you forgot to let your cream cheese soften, remove the paper packaging and place it on top of the pre-heating oven while you make the crust. It should be just soft enough once you finish.
** Either store bough egg-whites or traditional egg whites may be used - simply measure out a ¼ cup of either.
*** Depending on how light & fluffy you mixed your filling - you may have some remaining. Place it in an oven safe bowl, lightly coated with non-stick spray and bake along side the mini cheesecake bites for a crustless treat.
3.5.3208

And just for comparison – let’s take a look at how my healthified chocolate almond cheesecake bites [left] compare to something similar – like the Cheesecake Factory’s Hershey’s Chocolate Bar Cheesecake [right, source].

Chocolate Almond Cheesecake Bite Screen Shot 2014-01-20 at 4.31.10 PM

I’m not sure about the rest of you but 500 calories is almost 1/3 of my daily calorie intake (roughly 1 meal) and 30 grams of fat maxes out my average fat intake for the day. Plus, this doesn’t even account for the whipped cream and adorning chocolate syrup that accompanies the cheesecake to your table.

I know in my case, I’m much safer enjoying my portion controlled cheesecake bite with a glass of red wine on the side while not having to stress about burning the extra calories at the gym in the morning.

DSC01126

Filed Under: Cake & Cupcakes, Desserts Tagged With: almond, cheesecake, chocolate, dessert, recipe

Chocolate Cherry Wine Cookies

May 11, 2013 by Alyssa

My Mom had this saying, which she always found hilarious, though she never drank.  I’m sure you’ve heard it…

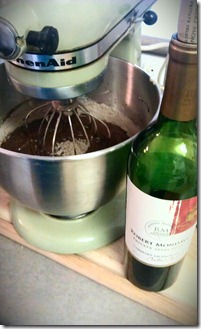
So in honor of the little meme that makes my Mother giggle,  today I cooked with wine – and restrained myself from sipping straight from the bottle. 

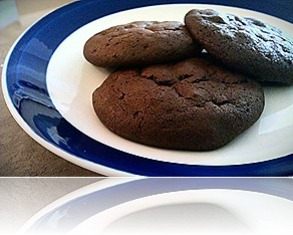
The cookies I chose to make combined my favorite red wine pairings – dark chocolate and dried cherries.  These cookies were healhified per my usual means and turned out delicious.  They can not only be considered heart healthy from the antioxidants found in the red wine, cherries and chocolate but they’re also low-cal and low-fat.  Very diet friendly!

IMAG0441-1IMAG0442-1

If you’re in the mood for a treat and have some excess red wine to use up, I definitely suggest this recipe.
It’s probably best paired with a freshly opened bottle of red wine!

Chocolate Cherry Wine Cookies
 
Save Print
Prep time
25 mins
Cook time
8 mins
Total time
33 mins
 
Rich chocolate cookies with a hint of red wine and dried cherries.
Serves: 38 cookies
Ingredients
  • 1¾ cup all-purpose flour
  • ¾ cup unsweetened baking cocoa
  • 1 tsp salt
  • 1 tsp baking soda
  • ¼ cup Smart Balance butter
  • ¼ cup Chobani 0% plain yogurt
  • ¾ cup sugar
  • ¾ cup light brown sugar
  • 1 egg
  • 1 tsp vanilla
  • ½ cup dry red wine
  • ½ cup chopped dried tart cherries
  • ¼ cup semi-sweet chocolate chip minis
Instructions
  1. Preheat oven to 375°.
  2. In a separate bowl, combine flour, cocoa, baking soda, and salt, stirring with a whisk. Place sugar and butter in a large bowl; beat with a mixer at high speed until well blended.
  3. Add vanilla, wine and egg; beat well. With mixer on low speed, gradually add flour mixture. Beat just until combined.
  4. Fold in cherries and chocolate chips.
  5. Drop by tablespoonful 2 inches apart onto nonstick baking sheets.
  6. Bake at 375° for 8 minutes or just until set. Remove from oven; cool on pans 5 minutes. Remove from pans; cool completely on wire racks.
Nutrition Information
Calories: 76 Fat: 1.45 Carbohydrates: 14.5 Sugar: 8.7 Protein: 1.18
3.5.3208


Filed Under: Cookies, Desserts Tagged With: cherries, cookies, red wine, wine

  • « Go to Previous Page
  • Go to page 1
  • Interim pages omitted …
  • Go to page 5
  • Go to page 6
  • Go to page 7

Primary Sidebar

Welcome!

Hi, I’m Alyssa! I’m a foodie with a sweet tooth and an obsessed dog-mom! On the blog you’ll find a little bit of everything – it’s heavy on dessert, wine, and life in Austin, Texas with a sprinkling of lifestyle.

Let’s Connect!

  • Email
  • Facebook
  • Instagram
  • Pinterest
  • Twitter

What Readers Are Loving

Slow Cooker Indian Chicken Curry: The Only Curry Recipe You'll Ever Need
Best Ever Bakery-Style Oatmeal Raisin Cookies
Dilly Bars -- Chocolate Peanut Butter Rice Krispie Treats
No-Bake Cake Batter Cake Balls
Lemongrass Coconut Chicken Curry
Street-Cart Style Falafel and Rice Bowls
memorialday80

Follow Me on Pinterest!

Category Search

Footer

  • Email
  • Facebook
  • Instagram
  • Pinterest
  • Twitter

Copyright © 2025 · Foodie Pro Theme by Shay Bocks · Built on the Genesis Framework · Powered by WordPress


Loading Comments...